If you are looking for a way to create an adobe pdf file of your schedule that clearly displays an outline of your project tasks and corresponding Gantt chart, then you should check out the many great print options available in Microsoft Project 2013.
Let's say that you've created a Gantt chart with tasks and relationships and you now have a critical path. Now you need to get a viewable copy of the tasks view and corresponding Gantt chart view to your stakeholders. Microsoft Project 2013 has the options available for viewing and printing a Gantt chart that can be saved as an Adobe pdf file.
This article discusses how to set up your tasks view, Gantt chart view, and corresponding printer options in Microsoft Project 2013 to create an adobe pdf file of your project for wide distribution. While this article uses Microsoft Project 2013 examples, the good news is that most of this functionality is available in earlier versions of Microsoft Project.
Adjusting Your Gantt Chart Timescale
We start with what's involved in preparing your Gantt chart for viewing alongside your task view. Our goal is to display the Gantt chart in a way that will enable you to print the Gantt chart and corresponding tasks view on an 11"x17" sheet of paper. Our starting point is the tasks view and Gantt chart shown in Figure 1.
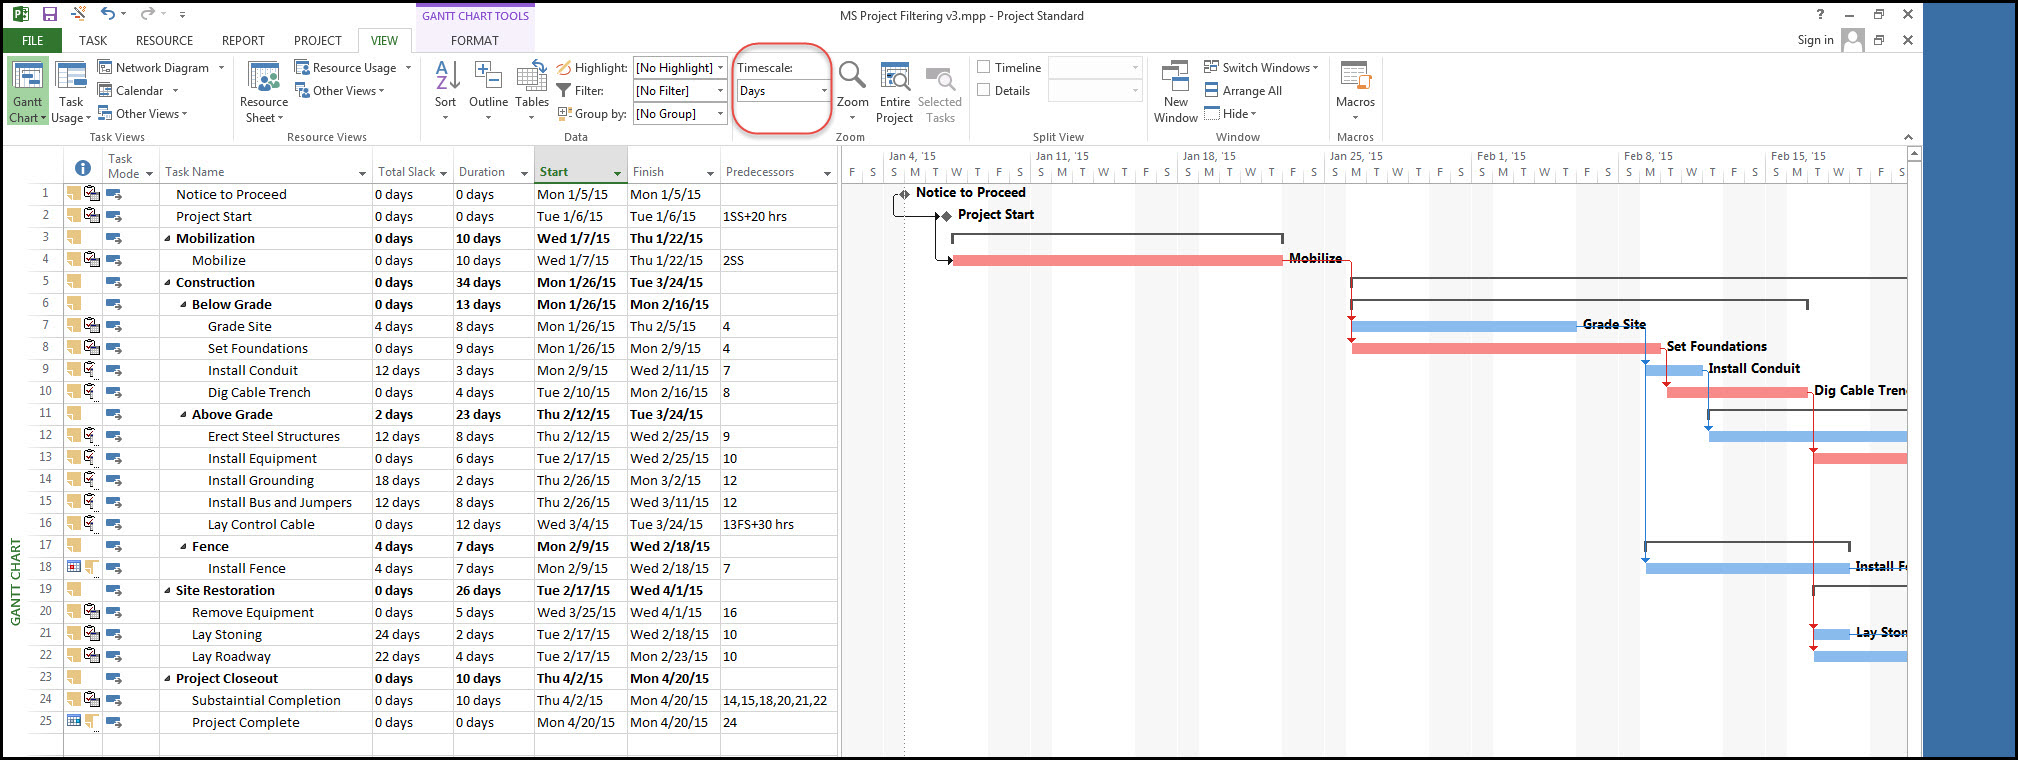
Figure 1
Note that we cannot see the full Gantt chart because the timescale is set to days, Figure 1, which makes your Gantt chart way too long for viewing on an 11"x17" sheet of paper. To change the timescale select the View tab > Zoom Ribbon > Timescale drop down menu, Figure 2.
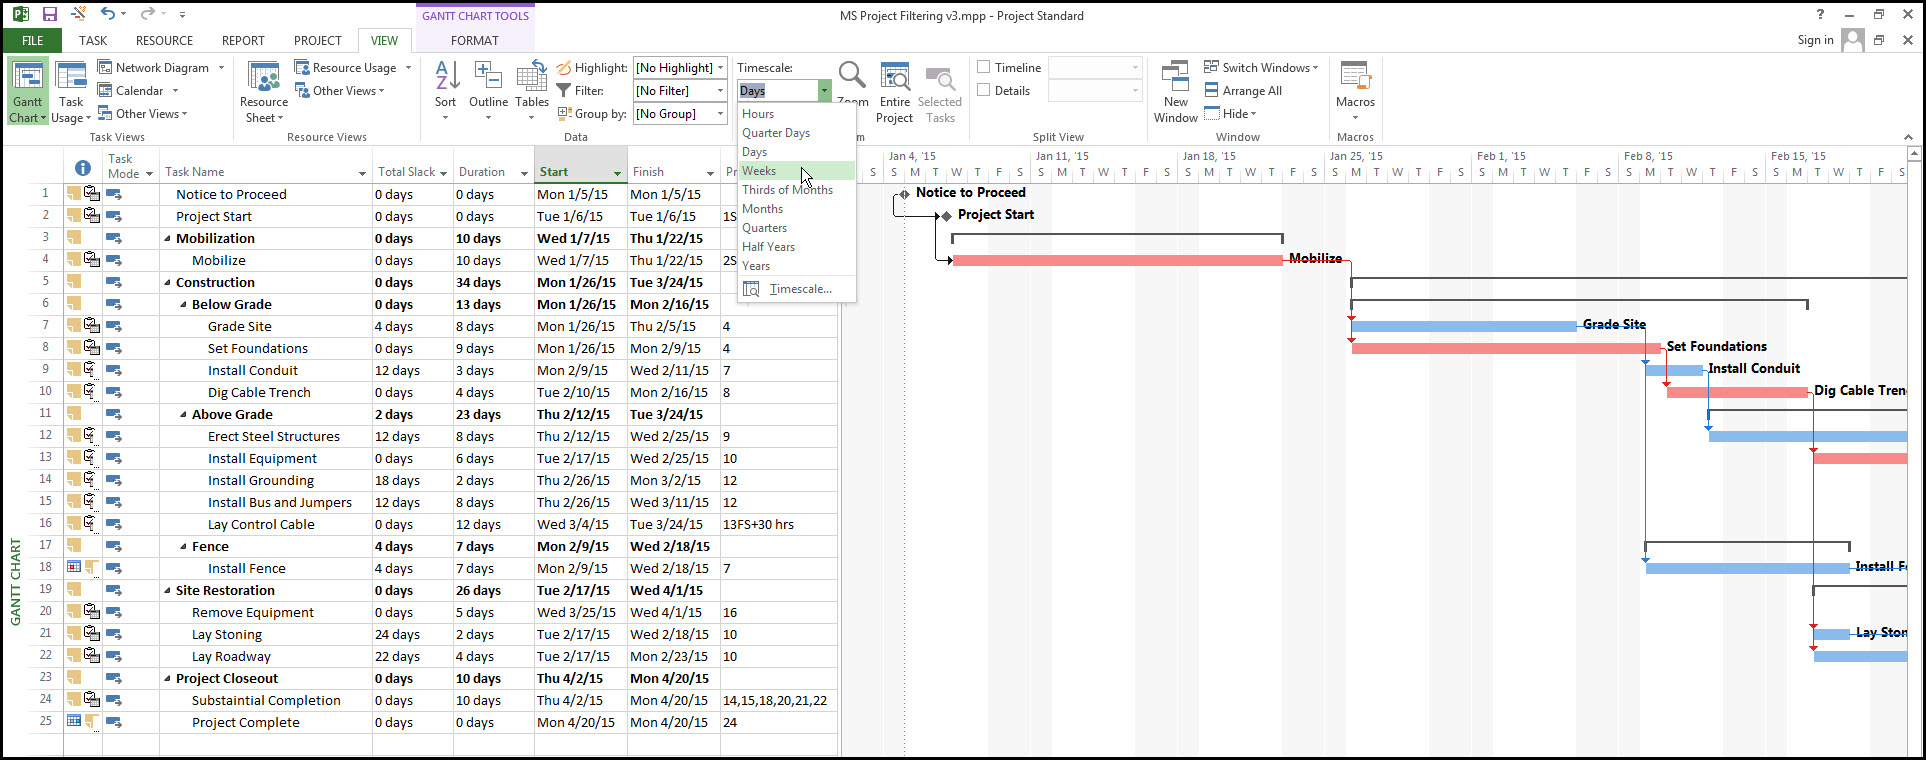
Figure 2
Set the Timescale to weeks, and your Gantt chart will look similar to Figure 3.

Figure 3
Adding Horizontal Gridlines To Your Gantt Chart
Your Gantt chart looks much better, but to enable comparison of the Gantt chart bars with the task view you will want to add horizontal gridlines. To add or change the gridlines select the Format tab > Format Ribbon > Gridlines menu > Gridlines option, Figure 4.
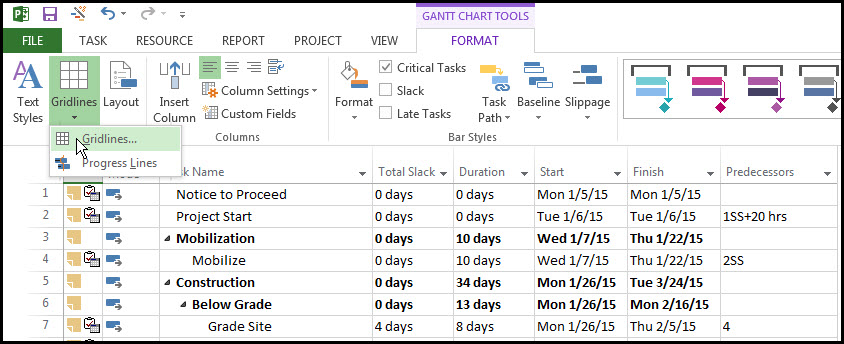
Figure 4
This brings up the Gridlines dialog, Figure 5.

Figure 5
Change the 'At interval' from None to Other, and from the toggle change the interval to one, Figure 6.
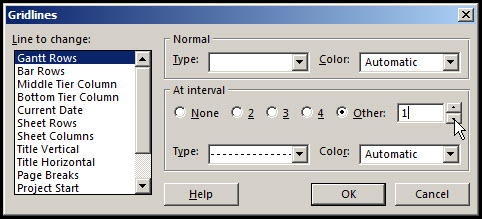
Figure 6
Now all your tasks including summaries have gridlines, Figure 7, which will make comparison between tasks and Gantt chart bars much easier.
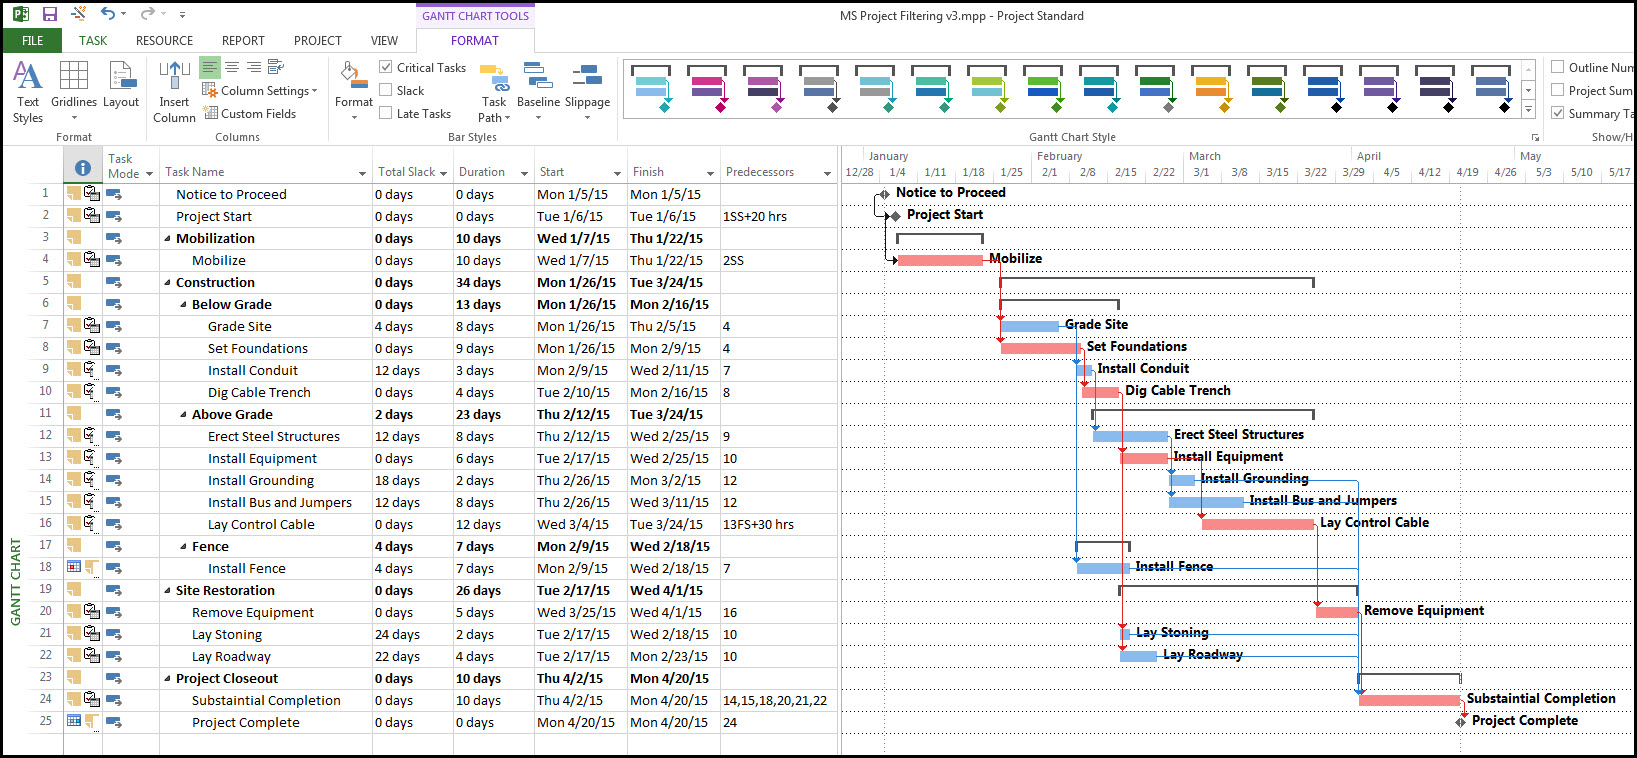
Figure 7
Adding Vertical Gridlines To Your Gantt Chart
Notice from Figure 7 that you have vertical gridlines on your milestones. These we will want to keep, but we also want to have vertical gridlines at the beginning of each month. To add monthly vertical gridlines activate the Gridlines dialog and in the 'Line to change' select 'Middle Tier Column', Figure 8.

Figure 8
Set the Normal Type to a dotted line and the Color to black or Automatic. Now your Gantt chart and associated gridlines will be similar to Figure 9.
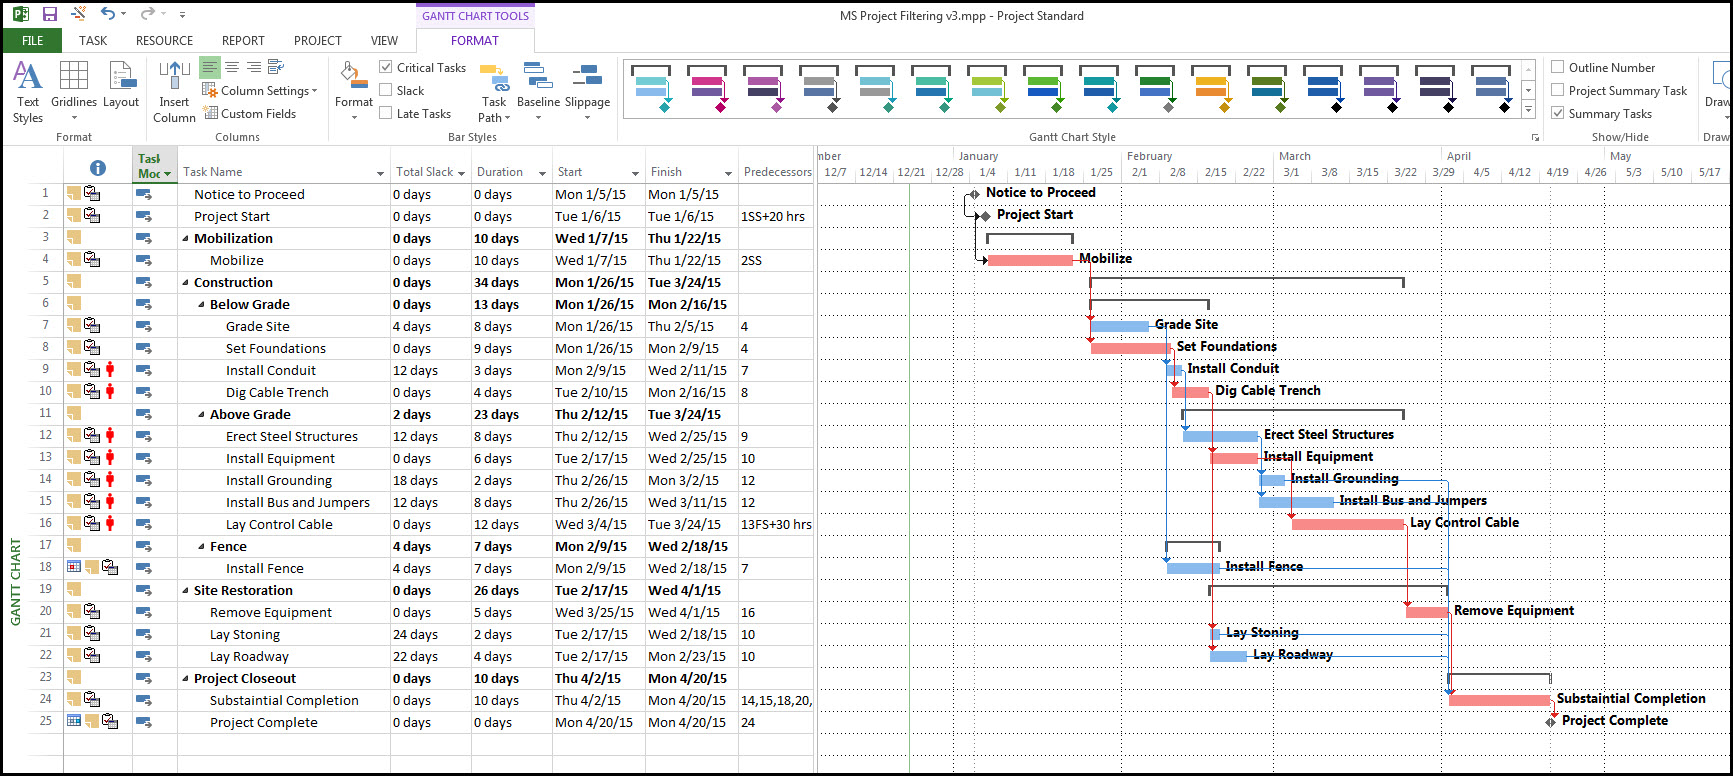
Figure 9
Printer Options
Now we want to set Microsoft Project 2013 to print an 11"x17" adobe pdf file. To do this select the File tab | Print selection, and then set the Printer to Adobe PDF, Figure 10.
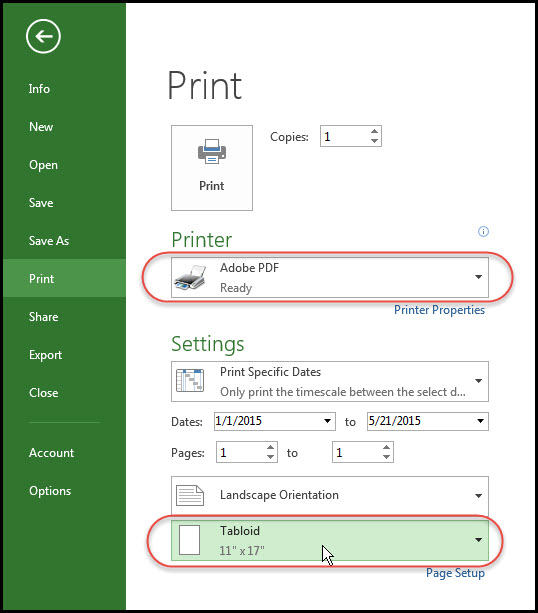
Figure 10
Also, set the sheet size to 11"x17", again, Figure 10. Note that your print setting is set to 'Print Specific Dates', which is what we want. However, select the Settings Print Specific Dates drop down menu and select the 'All Sheet Columns' option, Figure 11.
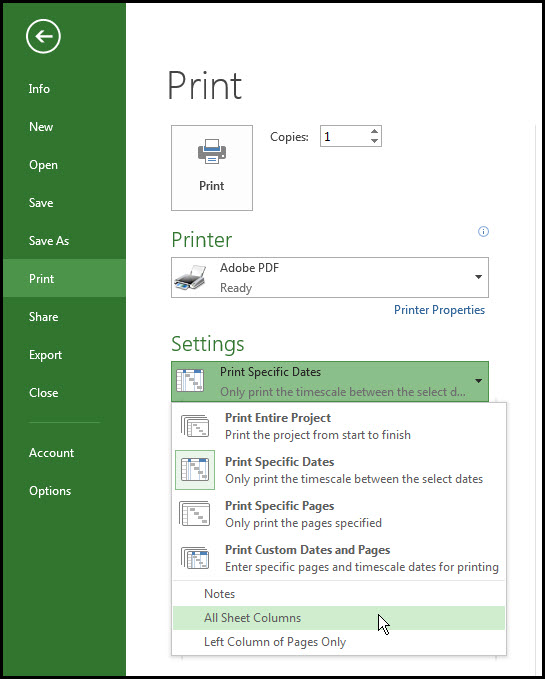
Figure 11
This will then include all your current columns in the Task view in the print out view. Note how your predecessors' column is now viewable in the print view, Figure 12.
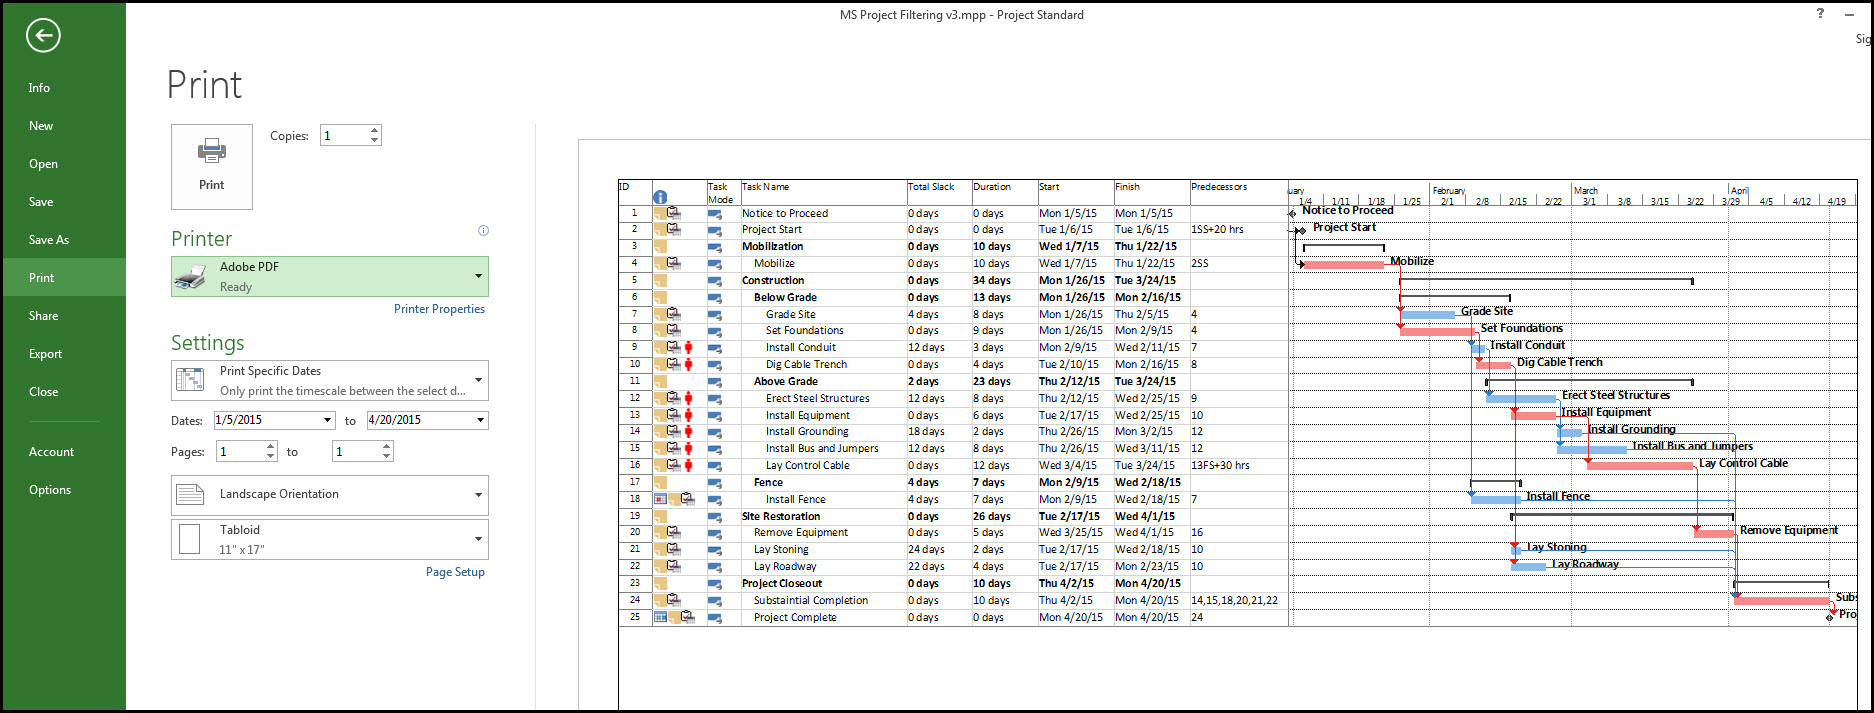
Figure 12
Gantt Chart Adjustments
Now to make certain you Gantt chart, including bar labels, is fully viewable in the dates section of the Settings change the start date to January 1, 2015, Figure 13, which is 4-days before the project start date.
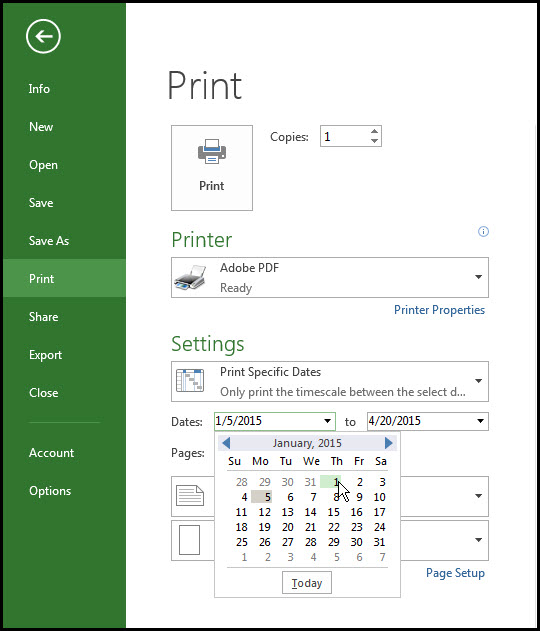
Figure 13
Likewise, change the end date to May 20, 2015, Figure 14, one month after the finish date. Setting the start and finish dates as such will ensure that your Gantt chart relationship arrows and labels are clearly viewable.
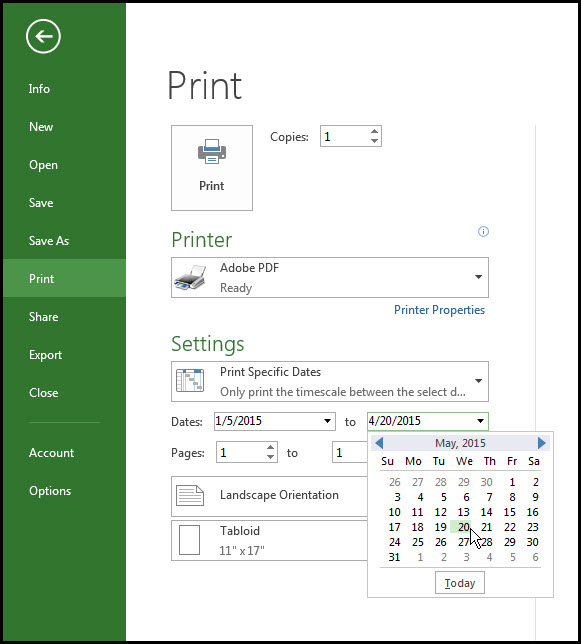
Figure 14
Your Gantt chart including labels should now be fully viewable as in Figure 15.
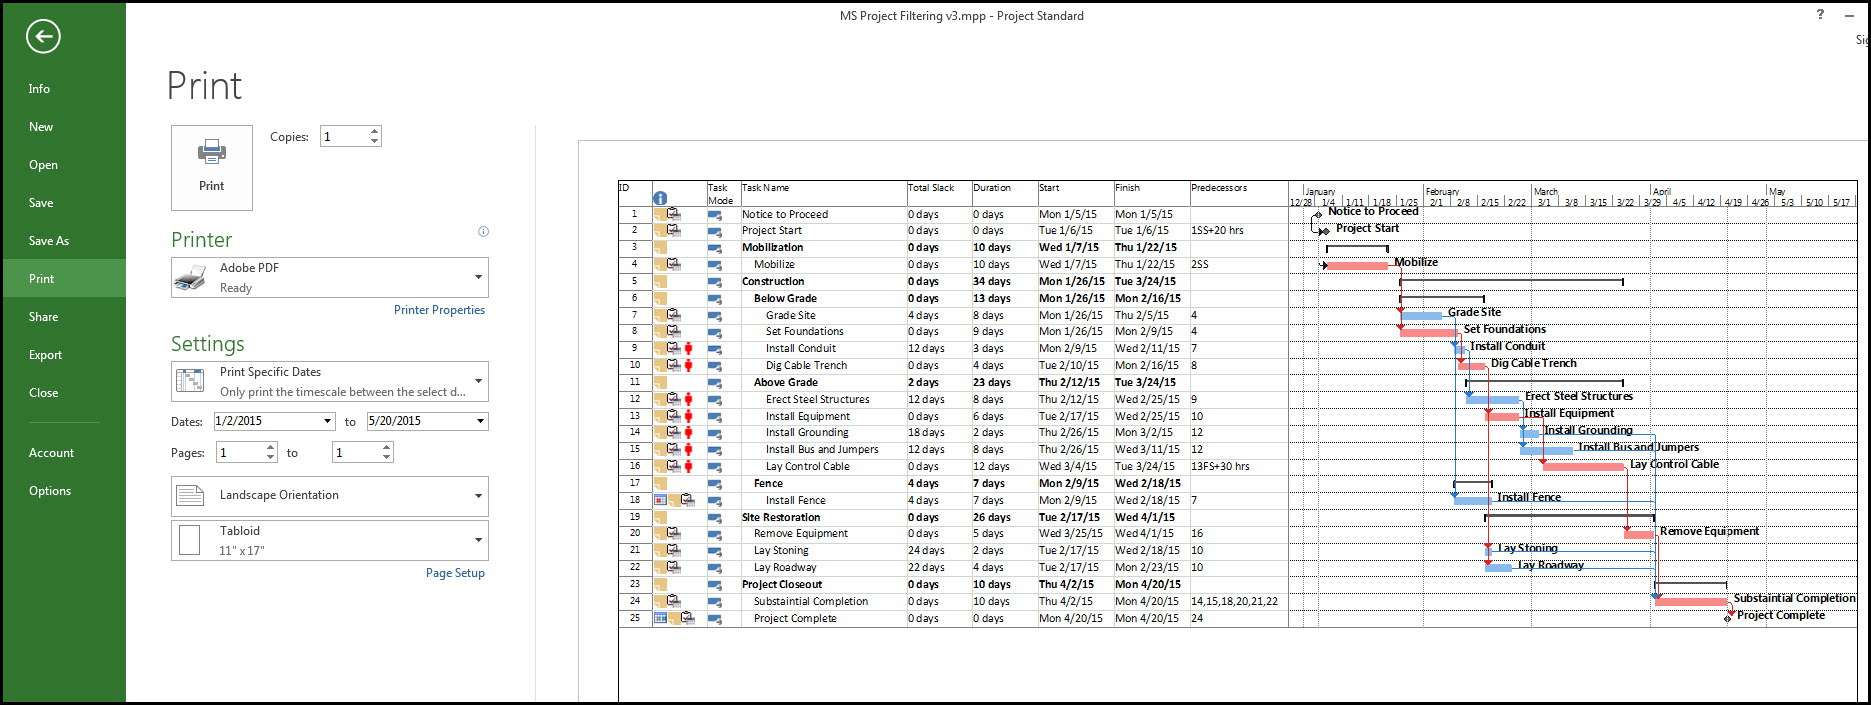
Figure 15
Outline Labels
Now to show the Outline number of each task and the Project Summary Task select the Formant tab > Show/Hide Ribbon and check the Outline Number and Project Summary Task boxes, Figure 16.

Figure 16
Your print preview will look similar to Figure 17.
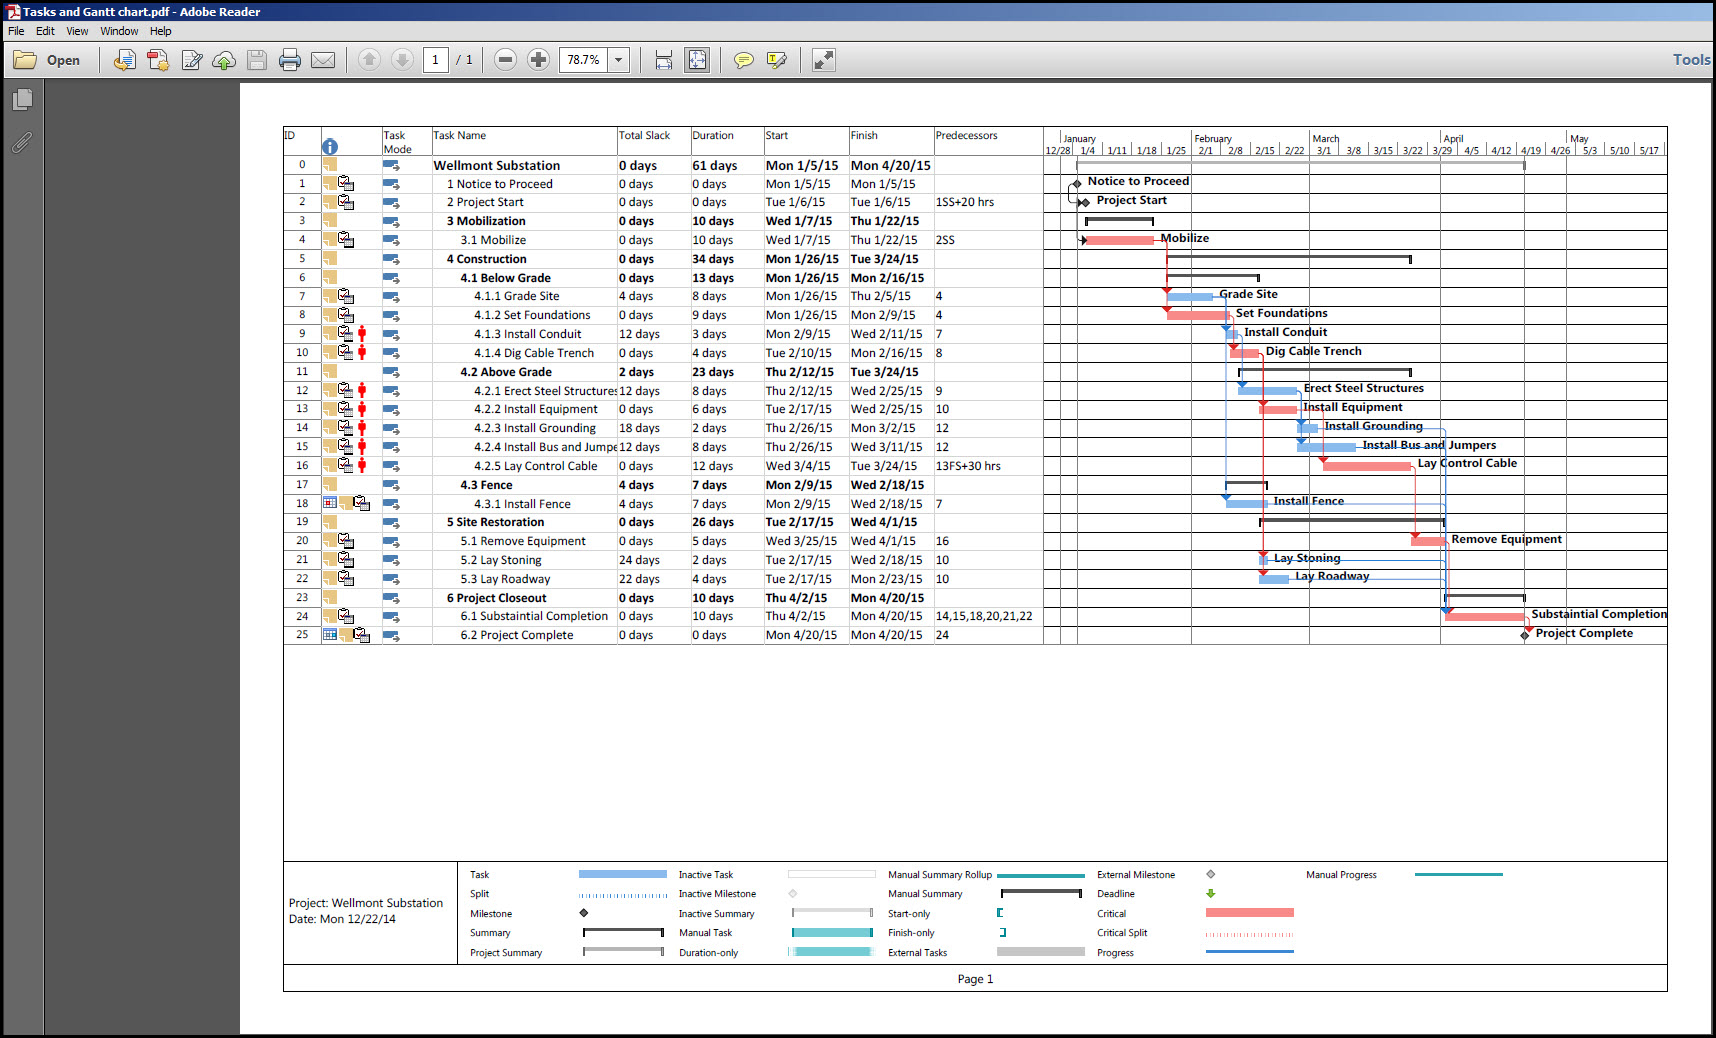
Figure 17
Legend
To change the Margins, Header, Footer, and Legend among other items select Page Setup in the Print dialog, Figure 18.
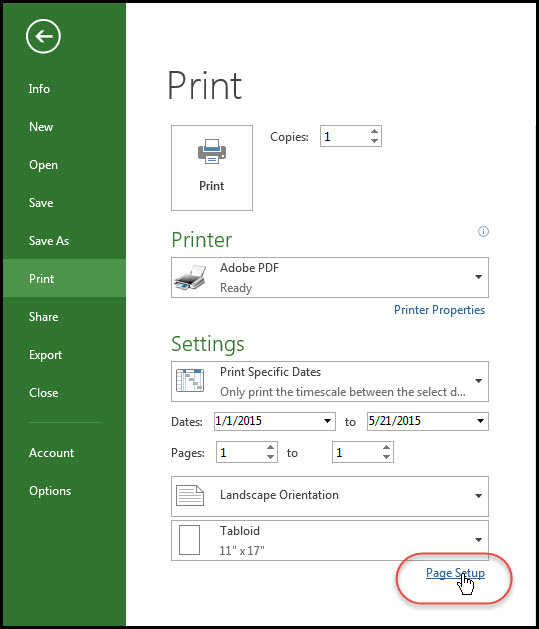
Figure 18
Select the Legend tab and Legend on: Every Page option, Figure 19, if it is not already selected.

Figure 19
You will, however, need to change the Legend width from 2 to 3-inches, Figure 20.
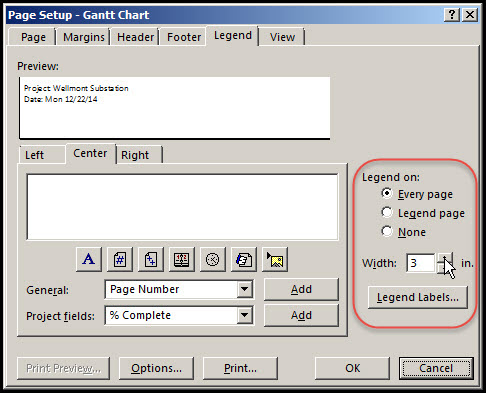
Figure 20
You, most likely, will want to limit the bars displayed in the Legend to only those on your Gantt chart. To do this select the Format tab > Bar Styles Ribbon > Format drop down menu > Bar Styles option, which will bring up the Bar Styles dialog. Then place an asterisk before the Name of every Bar Style that you do not want to display in your Legend, Figure 21.
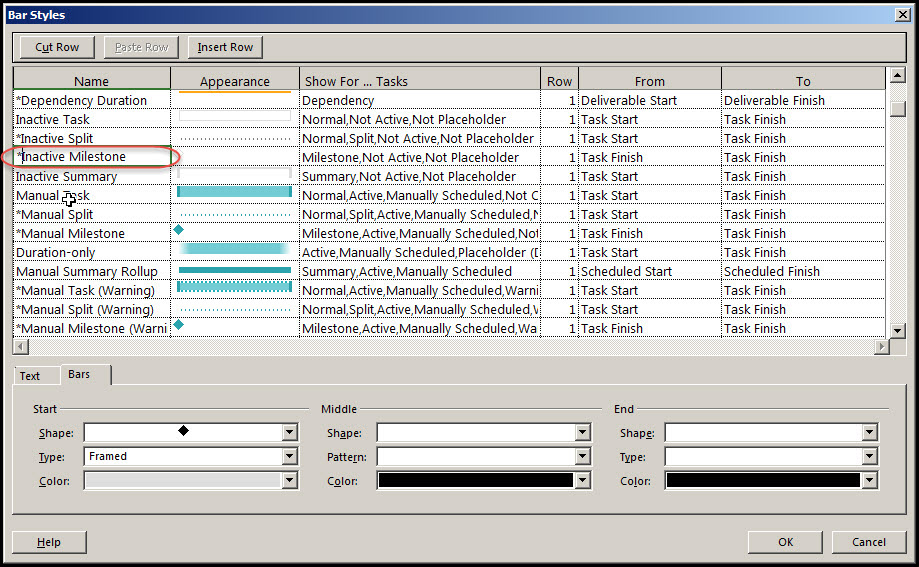
Figure 21
One More Step
You are now almost ready to print your schedule. The last item to change is to hide the Task Mode column, Figure 22. The Task Mode is most likely not of interest to upper level management and program sponsors.
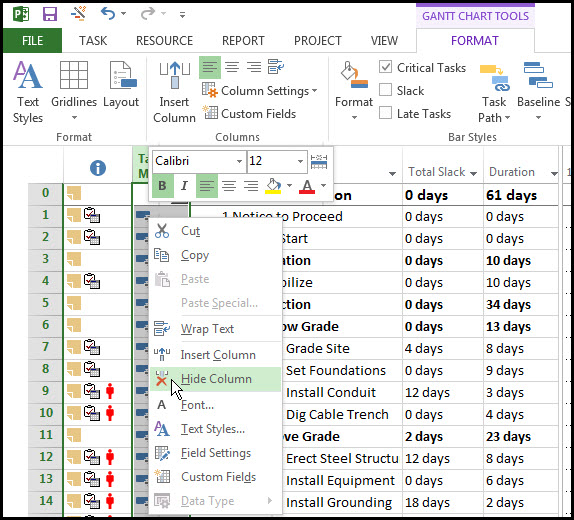
Figure 22
Finally, select Print from the Print dialog, and Microsoft Project 2013 will create an adobe pdf file similar to Figure 23.
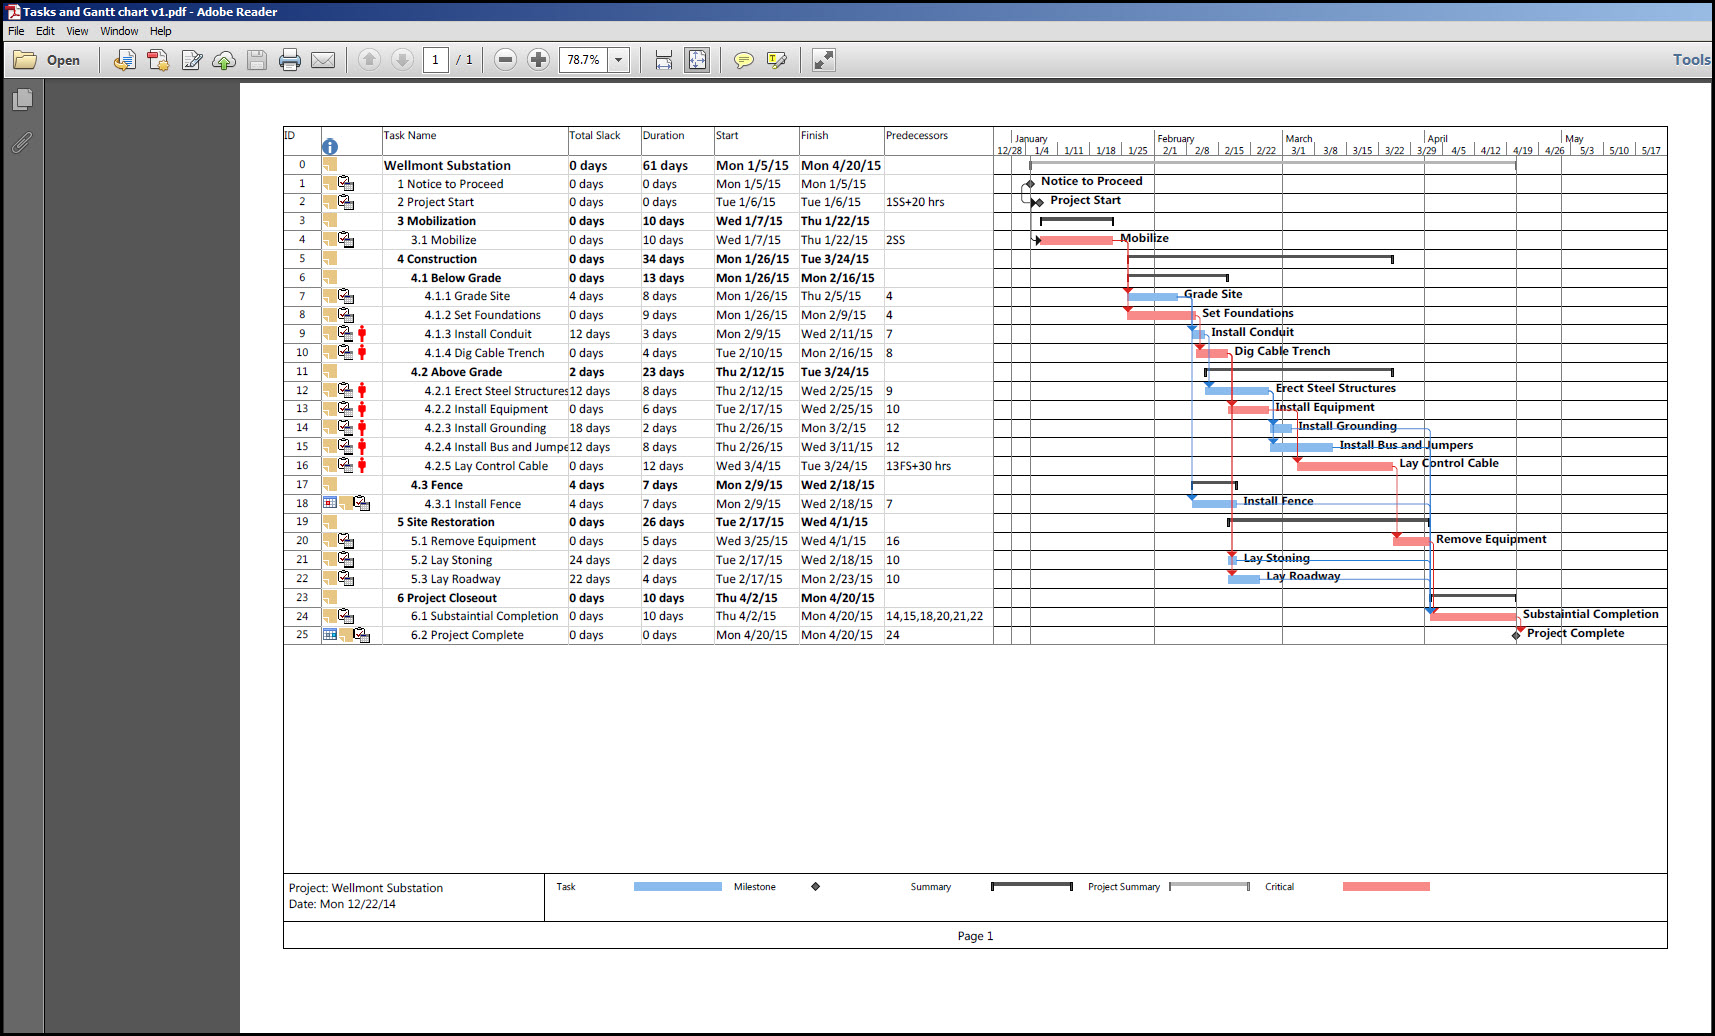
Figure 23
Summary
Microsoft Project 2013 is able to print out the Tasks view and Gantt chart view side by side. One key for getting your Gantt chart to fit on an 11"X17" is to select an appropriate Gantt chart Timescale. Also, select the Print Specific Dates option, and make the date span larger than your project time span, so your entire Gantt chart will be captured.
If your schedule is so large that an 11"x17" sheet of paper is simply not big enough to display it, you may want to download a free copy of CutePDF (www.cutepdf.com), and experiment with its print options. CutePDF creates a printer driver that works with Microsoft Project 2013 and most other applications. It allows for the printout of some very large formats such as ARCH E (36"x48") sized papers in pdf format.
In conclusion, Microsoft Project 2013 provides enough options for you to create suitable Adobe pdf files for a wide distribution of stakeholders and customers.
Source: https://tensix.com/microsoft-project-print-to-pdf-options-explored/
Posted by: laellaelworliee0268163.blogspot.com
